How to connect with other tools using a webhook
In this tutorial, we'll walk you through the process of connecting your FoxyApps application to third-party solutions using Zapier integration.
This powerful feature allows you to automate workflows and expand the functionality of your app.
1. Access the Integrations Tab of a AI-Tool
- After creating your tool in FoxyApps, navigate to the Integrations tab.
- Select the option Connect with other tools using webhook.

2. Set Up Zapier
-
Go to Zapier and click on Create new Zap.
Note: While this tutorial focuses on Zapier, you can use other platforms like Make or Pabbly for similar integrations.
-
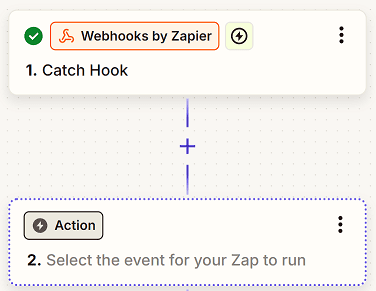
For the trigger, select Webhook.
-
Choose Catch Hook as the trigger event.
-
Click Continue.
-
Zapier will generate a custom URL for you. Copy this URL.
3. Configure FoxyApps Webhook
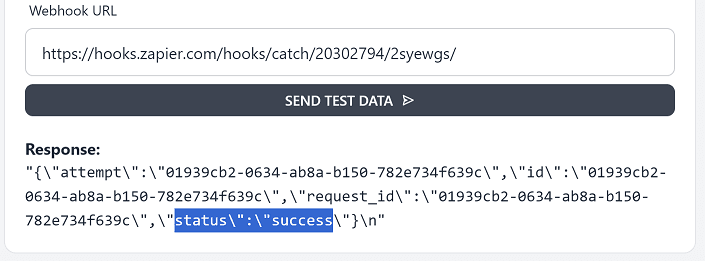
- Return to FoxyApps and paste the copied URL into the designated field.
- Click Send Data to test the webhook connection.
- You should see a "Status: Success" message.

4. Test the Zapier Trigger
- Go back to Zapier and click Test the trigger.
- You should see the request generated by FoxyApps.
- Click Continue with selected rows.

5. Connect to Third-Party Tools
Now that your webhook is set up, you can connect it to various third-party tools. Some options include:
- CRM systems like HubSpot or Salesforce
- Email marketing platforms like Mailchimp
- Email services like SendGrid
For this example, let's connect to SendGrid:
- Search for and select SendGrid in Zapier.
- Choose the action "Send an email".
- Connect your SendGrid account if you haven't already.
- Configure the email settings as needed.
With this setup, every time someone uses your FoxyApps tool, it will trigger the webhook and send an email via SendGrid (or perform whatever action you've configured).
Remember, the power of this integration lies in its flexibility. Feel free to experiment with different third-party tools and actions to find the perfect setup for your specific needs.
